Step 13
Wipe the mould clean after making each stove and wash it thoroughly when you finish moulding the last
stove. The mould should be left completely clean and dry, ready for making the next stove.
Finishing the stove liner
Handle each wet stove with great care. Avoid pushing it out of shape, because although it can be reshaped
it may crack later during drying or firing.
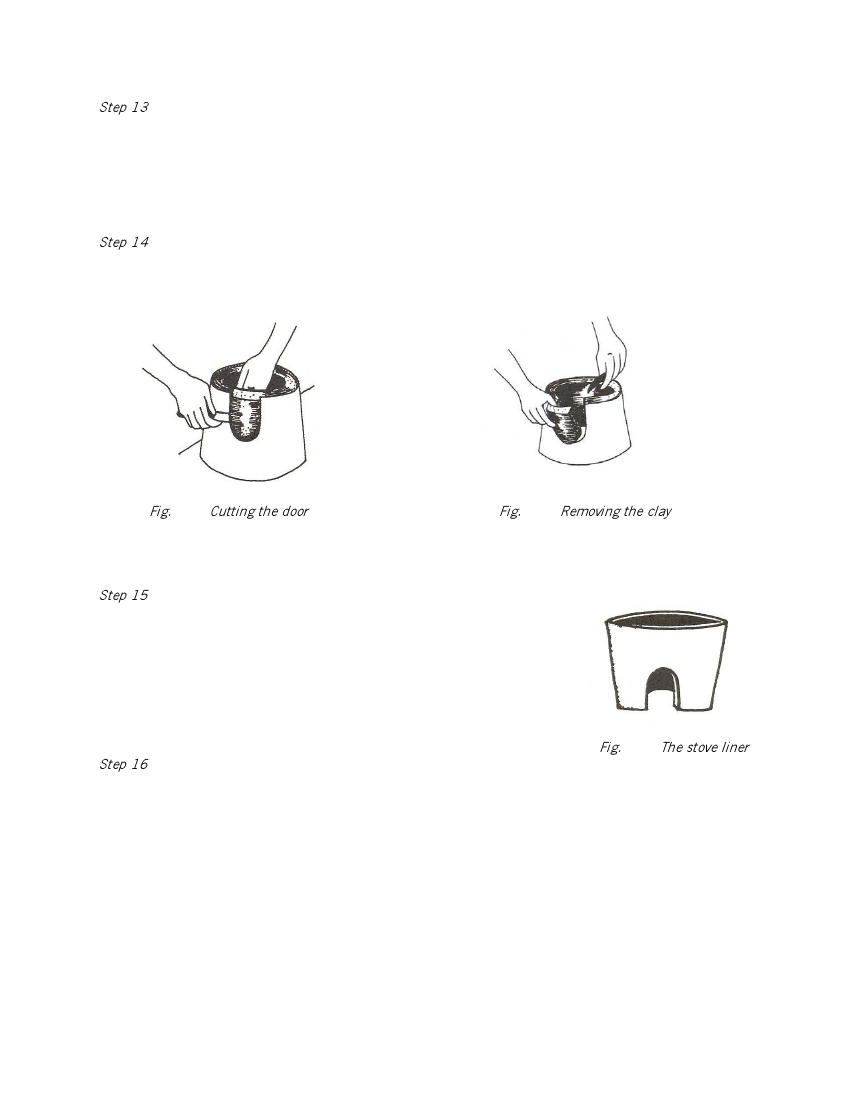
Step 14
Leave the liner to dry for a day, to make the clay firmer. If the climate is cool or wet, you may have to leave
it for two days. Do not move the liner. Place the template of the door against the stove. Cut out the door
using a wet knife, and smooth out its edges.
Fig. 4.17 Cutting the door
Fig. 4.18 Removing the clay
Keep the knife at the correct angle to ensure that the inner door measurement is ~ the same as the outer
one.
Step 15
Leave the liner to dry for one more day or until it is dry enough to be moved
without being damaged. Carefully turn the liner the right way up.
Fig. 4.19 The stove liner
Step 16
Mark the positions of the pot-rests by laying three fingers inside the liner next to the door and then making
a vertical mark on the clay surface. Make four more marks at intervals of 1 cm away from the door. Repeat
this on the other side of the door.
To make the final pot-rest, make another mark directly opposite the middle of the door; then make two
more marks, 1 cm on either side of the first mark. It is very important that the pot-rests are equally spaced.
This ensures that the cooking pot will be stable on the stove.